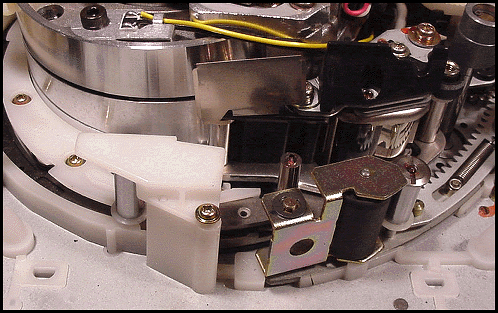
The threading components shown in photo and graphic on the previous pages were shown in the tape threaded position. (With the video tape pulled from the cassette and located upon the various path guides.) This was done for identification purposes because the number two and three guides are folded away and are not visible in the unthreaded position. For the internal cleaning opening steps we want to begin with no tape inside, like in the photo illustration below. Unplug the unit then use your Phillips screwdriver to remove the screws on the sides that secure the cabinet top, set the them aside for later. Lift the cabinet off and examine the position of the path components. If the loader and threading components are not as shown below you will need to temporarily replace the cabinet top, plug the unit into a power outlet and press the eject button. If the tape path components will not return to the unthreaded (unloaded) position, service will be required and the internal cleaning cannot be performed. (Unloaded is with shuttle and pinch roller nested together under and next to the white protection guard in front of the ACE assembly as shown below.)  Now that you have your path components in their proper position let's look at an overview of the cleaning steps. To continue click here. To go back to the previous panel click here. Note: The top plate of the tape loading assembly has been removed to allow for better visibility. It not required or recommended that you do this during your cleaning steps. |